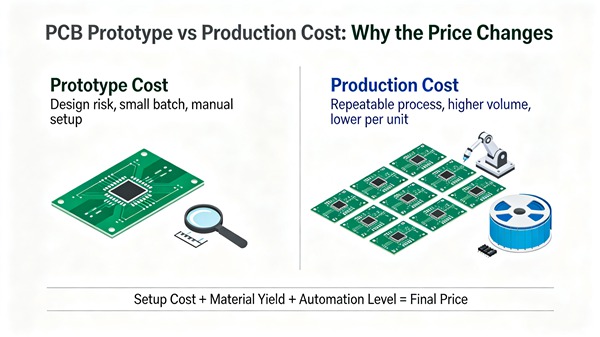
It is common for an engineering team to receive a PCB prototype quotation that seems expensive and then receive a much lower unit price when the same design moves into production.
At first, this can look inconsistent.
The PCB has not changed.
The Gerber files may be identical.
The material may be the same.
So why does the price per board change so much?
The answer is that prototype manufacturing and production manufacturing have different cost structures.
A small prototype order must absorb engineering preparation, setup, tooling, material preparation, and other fixed costs across a limited number of boards.
A production order distributes those costs across a much larger quantity and usually benefits from better panel utilization and more efficient material purchasing.
Understanding this difference makes it easier to evaluate PCB quotations realistically.
Table of Contents
Prototype Cost and Production Cost Are Not Calculated the Same Way
A simplified way to think about PCB pricing is:
Total PCB cost = fixed manufacturing costs + variable production costs
Fixed costs may include:
- Engineering preparation
- CAM processing
- Tooling
- Production setup
- Test preparation
Variable costs include:
- PCB materials
- Copper
- Fabrication
- Surface finish
- Testing
- Packaging
For a 10-piece prototype, the fixed portion can represent a significant part of the total cost.
For a 10,000-piece production order, the same fixed cost has a much smaller effect on the unit price.
This is the basic reason why prototype unit prices are usually higher.
Why Prototype PCBs Cost More Per Unit
Engineering Preparation
Every manufacturing job needs to be reviewed and prepared.
This can include:
- Gerber verification
- Drill file processing
- DFM checks
- Stackup confirmation
- Production data preparation
Whether the order contains 10 boards or 10,000 boards, much of this work still has to be completed.
Tooling and Setup
Depending on the fabrication process, the manufacturer may need to prepare:
- Production tooling
- Drilling data
- Imaging data
- Test fixtures
- Panelization
These costs are difficult to distribute across a very small order.
Small Material Purchases
Production volumes usually allow materials to be purchased more efficiently.
A prototype order may require a relatively small amount of a particular:
- Laminate
- Prepreg
- Copper foil
- Surface finish
The material purchasing economics are different from those of a recurring production program.
Why Production PCB Prices Fall
Once a product enters regular production, several things become more efficient.
Fixed Costs Are Distributed
A setup cost that is significant for 10 boards becomes almost negligible when distributed across thousands of units.
Panel Utilization Improves
Production jobs can often be optimized around a stable panel configuration.
The manufacturer knows:
- Board orientation
- Panel quantity
- Tooling requirements
- Routing strategy
This improves material utilization.
Material Planning Becomes Easier
Recurring production allows materials to be planned more efficiently.
This can reduce procurement uncertainty and improve manufacturing scheduling.
Production Processes Become More Stable
Once the design is established, the same manufacturing process can be repeated.
This reduces the amount of engineering attention required for each individual order.
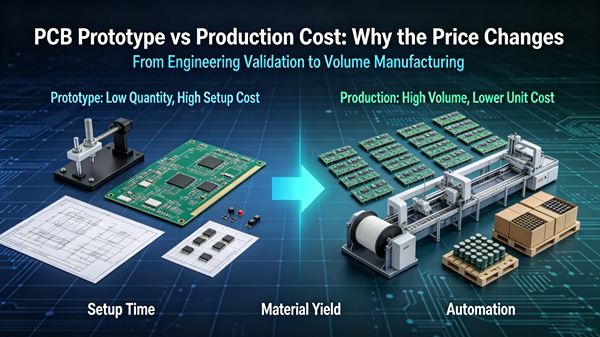
Prototype Quantity Has a Strong Effect on Unit Cost
Consider a simplified example.
Suppose a hypothetical PCB job has a fixed preparation cost of $200.
If only 10 boards are ordered:
$200 ÷ 10 = $20 per board
If 100 boards are ordered:
$200 ÷ 100 = $2 per board
If 1,000 boards are ordered:
$200 ÷ 1,000 = $0.20 per board
The actual PCB quotation is obviously more complicated, but the principle is important.
The same fixed manufacturing activity has a very different effect on unit price depending on quantity.
Does Ordering More Prototypes Always Save Money?
Not necessarily.
A larger prototype order can reduce the unit price, but it also increases total spending before the design has been validated.
For example, if an engineering team orders 200 boards and then discovers a major routing problem after the first 20 are assembled, the remaining boards may become obsolete.
This is why prototype quantity should be based on the validation plan rather than unit price alone.
The Cost Structure Changes During Product Development
A PCB project usually passes through several stages.
Initial Prototype
The objective is to verify whether the design works.
Typical quantities are relatively small.
Engineering Validation
The focus moves toward:
- Electrical performance
- Thermal behavior
- Mechanical fit
- Assembly
Pilot Production
The manufacturing process itself is evaluated.
The team may examine:
- Yield
- Assembly repeatability
- Test coverage
- Production consistency
Volume Production
The focus shifts toward:
- Unit cost
- Capacity
- Delivery
- Material planning
- Long-term reliability
The same PCB can therefore have very different economic priorities at each stage.
Prototype and Production Should Usually Use the Same Critical Specifications
There is an important distinction between cost optimization and changing the product definition.
If the final PCB requires:
- High-Tg material
- Controlled impedance
- Specific copper thickness
- ENIG
- HDI
- Fine-pitch BGA support
then changing those parameters simply to reduce prototype cost may make the prototype less representative.
For engineering validation, the prototype should reproduce the characteristics that matter to the final product.
Otherwise, test results may not transfer cleanly to production.
This is particularly important for complex designs where HDI PCB Cost and fabrication structure can significantly affect the final board.
When Can Prototype Specifications Be Simplified?
Not every detail needs to be identical.
Some non-critical manufacturing parameters may be optimized if they do not affect:
- Electrical behavior
- Mechanical fit
- Thermal performance
- Assembly
- Reliability
For example, a non-critical manufacturing dimension may be able to use a standard tolerance.
But this decision should be made deliberately rather than simply selecting the cheapest option.

PCB Prototype vs Production: Main Cost Differences
| Cost Factor | Prototype | Production |
|---|---|---|
| Quantity | Low | Higher |
| Engineering cost per unit | High | Low |
| Setup cost per unit | High | Low |
| Material purchasing | Small volume | Larger volume |
| Panel optimization | Limited | More efficient |
| Unit price | Higher | Lower |
| Design flexibility | High | Lower after release |
| Main objective | Validation | Repeatable production |
The table explains why a prototype quotation should not be used as a direct prediction of the final production unit price.
Board Complexity Still Matters
Increasing production quantity does not eliminate the cost of complex PCB construction.
A production run of an HDI PCB will still require more processes than a conventional 4 layer PCB.
Cost drivers can include:
- Layer count
- Sequential lamination
- Microvias
- Via filling
- Heavy copper
- Special materials
- Tight tolerances
- Controlled impedance
The effect of quantity is therefore only one part of the overall cost equation.
How-To: Estimate Whether a Project Is Ready for Production
Step 1: Confirm the Electrical Design
Check whether major design issues have been resolved.
This includes:
- Functional performance
- Signal integrity
- Power behavior
- Thermal performance
Step 2: Complete Mechanical Validation
Confirm:
- Board dimensions
- Mounting holes
- Connector positions
- Component height
- Enclosure fit
Changing these after volume production begins can create significant cost.
Step 3: Validate PCB Assembly
The PCB should be tested together with the actual assembly process.
Look for:
- Soldering problems
- Component placement issues
- BGA defects
- Rework requirements
- Test access problems
Step 4: Review Manufacturing Feedback
Before production, review whether any PCB features are unnecessarily difficult to manufacture.
Typical examples include:
- Very small holes
- Extremely narrow traces
- Unnecessary microvias
- Tight tolerances
- Difficult panelization
This is where a manufacturing review can provide real cost savings.
Step 5: Compare Prototype and Production Quotations
Do not only compare unit prices.
Compare:
- Same material
- Same stackup
- Same surface finish
- Same copper
- Same testing
- Same quality requirements
This creates a realistic baseline.
When Should You Move From Prototype to Production?
There is no universal quantity threshold.
The correct point depends on product maturity.
A project is generally closer to production when:
- The PCB design has passed functional testing
- Mechanical fit has been confirmed
- Assembly problems are under control
- Major design changes are unlikely
- Manufacturing requirements are documented
- Testing procedures are defined
If the design is still changing frequently, producing a large quantity simply to obtain a lower unit price can create unnecessary inventory risk.
How to Reduce the Gap Between Prototype and Production Cost
There are several practical approaches.
Standardize the Design
Avoid unnecessary special materials or fabrication processes.
Plan Panelization Early
A production-friendly board outline can improve material utilization.
Use Stable Manufacturing Specifications
Frequent changes to stackup or surface finish create additional engineering work.
Order Based on Development Stage
Use smaller quantities during early development and increase volume as the design stabilizes.
Review DFM Before Production
A DFM review can identify unnecessarily expensive manufacturing features.
Why the Lowest Prototype Price Is Not Always the Best Choice
A prototype has a specific purpose: to validate the design.
If a lower-cost prototype uses a different material, different stackup, or different manufacturing structure, its test results may not accurately represent the production PCB.
For example, changing the dielectric system on a high-speed board can affect impedance and signal behavior.
Similarly, changing an HDI structure may affect BGA fanout and assembly behavior.
The prototype should therefore be optimized for useful engineering information, not simply the lowest possible price.
FAQ
Small orders must absorb fixed engineering, setup, tooling, and preparation costs across a limited number of boards. Production quantities distribute those costs over many more units.
Yes. More complex designs have higher fabrication costs at both stages. HDI, high layer counts, heavy copper, special materials, and tight tolerances can all increase the price.
When material properties affect electrical, thermal, mechanical, or reliability performance, they should generally be representative of the production design.
There is no fixed number. The quantity should reflect the number needed for assembly, engineering tests, destructive testing, customer samples, and backup units.
Often yes. Quantity planning, panelization, standard manufacturing rules, appropriate surface finish, and avoiding unnecessary expedited production can reduce cost without changing critical specifications.
Conclusion
The difference between PCB prototype and production pricing is mainly a difference in cost distribution and manufacturing efficiency.
Prototype orders carry a larger share of:
- Engineering preparation
- Setup
- Tooling
- Material preparation
- Testing preparation
Production orders spread these costs across much larger quantities and benefit from more efficient manufacturing planning.
The best strategy is not to force prototype pricing down at any cost.
Instead:
validate the right design first, then optimize the manufacturing economics as the design moves toward production.
That approach reduces the risk of paying for large quantities of boards before the design is stable while also creating a smoother transition to volume manufacturing.
For projects moving from prototype to production, TOPFAST can evaluate the manufacturing specification at both stages so that prototype changes do not unintentionally create problems when the design enters regular production.
 EN
EN  PT
PT  AR
AR  DE
DE  FR
FR  ES
ES